
THE FASCINATING WORLD OF NETWORKING
OPTIMIZED FOR GOOGLE CHROME
PART I: Clientless SSL VPN using ASDM
Date: 18-3-2014
Table of contents
-
Topology
-
Clientless SSL VPN Wizard
Topology
The topology in this WebVPN example is as follows:

-
PC is a cloud linked to a virtual interface.
-
INTERNET is a cloud linked to a real interface.
-
ASA1 runs ASA Version 8.4(2)
-
R4 & R5 are multilayer switches only used for connectivity (without any configuration).
The initial configuration is:
interface GigabitEthernet 0
nameif management
ip address 192.168.0.1 255.255.255.0
security-level 100
no shutdown
!
interface GigabitEthernet 1
nameif outside
ip address 192.168.1.20 255.255.255.0
security-level 0
no shutdown
!
route outside 0.0.0.0 0.0.0.0 192.168.1.1
!
http server enable
http 192.168.0.3 255.255.255.255 management
enable password cisco
username juantron password juantron privilege 15
!
dns domain-lookup outside
dns server-group DefaultDNS
name-server 8.8.8.8
Clientless SSL VPN Wizard
Run Cisco ASDM-IDM Launcher:


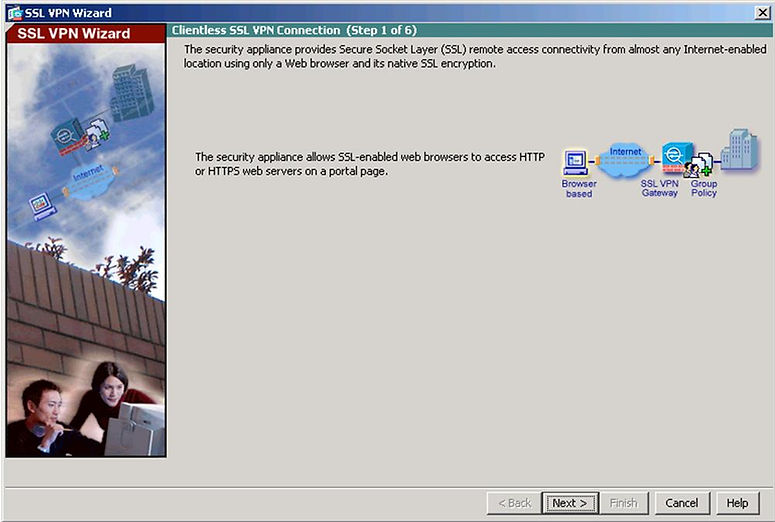
Use the VPN Wizard by choosing Wizards > VPN Wizards > Clientless SSL VPN Wizard . The Clientless SSL VPN Connection window opens, as shown in Figure
The SSL VPN Interface window appears, as shown in Figure

Configure a connection profile name for the connection and identify the interface to which outside users will connect.
NOTE: By default, the ASA uses a self-signed certificate to send to the client for authentication. Optionally, you may configure the ASA to use a third-party certificate to connect clients.
NOTE: The SSL VPN Interface screen provides links in the Information section. These links identify the URLs that need to be used for the SSL VPN service access (login) and for Cisco ASDM access (to access the Cisco ASDM software download).
Click Next to continue and display the User Authentication window, as shown in Figure

Identify how remote users will authenticate. You can configure authentication using a AAA server by checking the radio button. Click New to enter the location of the AAA server.
Alternatively, the local database can be used. To add a new user, enter the username and password and then click Add . This is my case.
Once complete, click Next to continue and open the Group Policy window, as shown in Figure

Identify a group policy that will be associated with the authenticated remote user.
NOTE: If you are configuring a new policy, the policy name cannot contain any spaces.
By default, the created user group policy inherits its settings from the DfltGrpPolicy.
NOTE: You may modify these settings after the wizard has been completed by navigating to the Configuration > Remote Access VPN > Clientless SSL VPN Access > Group Policies .
Click Next to continue.The Bookmark List window appears, as shown in Figure. A bookmark list is a set of URLs that is configured to be used in the clientless SSL VPN web portal. If bookmarks are already listed, use the Bookmark List drop-down menu, choose the bookmark you want.
To add bookmarks, click Manage and then Add to open the Add Bookmark List dialog. Click Add again to open the Add Bookmark dialog.

Add the bookmark and URL and keep clicking OK until you return to the Bookmark List window.
Click Next to continue. The Summary screen will open.

Review the information displayed. If correct, click Finish . Otherwise. click Back and correct the misconfiguration.
The configuration is then committed to the ASA, and the AnyConnect Connection Profiles screen opens.
NOTE Remember copy configuration to flash on ASDM.